Breastfeeding can be rewarding but also oh-so challenging. One aspect that most moms feel uncertainty about is handling breast milk.
You work so hard to get this precious breast milk, so you dont want it to go to waste, right?
In this guide, I’ll explore everything you need to know about breast milk, including storage guidelines, stash preparation, identifying spoilage, storage solutions, heating methods, and much more.
Pin For Later!

Understanding Breast Milk
First thing first. What is breast milk?
Well, breast milk is a remarkable fluid produced by the mother to nourish her baby.
What makes it so incredible is that it isn’t just one-size-fits-all. It changes over time to match your baby’s needs:
- Colostrum – the initial “liquid gold” produced after birth, packs essential nutrients and antibodies for a healthy start.
- Transitional milk – richer and creamier, follows within the first two weeks, often accompanied by breast changes like engorgement.
- Mature milk – thinner but perfectly balanced, adjusts to provide ideal nourishment.
Recognizing the various stages of breast milk will be helpfull when I’ll explain about storage.
Breast Milk Storage
Proper storage is crucial to maintain its quality and safety of your precious breast milk.
How Long Can You Store Breast Milk?
Breast milk storage duration depends on the method used.
Follow these guidelines to keep your milk fresh and safe for your baby:
| Storage Method | Safe Duration |
|---|---|
| Room Temperature (up to 77°F / 25°C) | Up to 4 hours |
| Refrigerator (32°F / 0°C or colder) | Up to 4 days |
| Freezer (0°F / -18°C or colder) | 6-12 months (best within 6 months) |
| Deep Freezer (-4°F / -20°C or colder) | Up to 12 months |
Store breast milk at the back of the refrigerator/freezer to avoid temperature fluctuations from opening and closing the door.
Choosing the Right Storage Containers
Investing in high-quality storage containers, such as breast milk storage bags or BPA-free bottles specifically designed for storing breast milk, is crucial for maintaining the quality and safety of the milk.
Breast milk storage bags are convenient and space-saving, allowing for easy storage in the freezer or refrigerator.
They are often pre-sterilized and designed for single-use, reducing the risk of contamination. They also have secure seals to prevent leaks.
BPA-free bottles designed for breast milk storage provide a durable and reusable option.
These bottles are typically made from safe materials that won’t leach harmful chemicals into the milk.
They often come with secure lids or caps to prevent spills during storage or transportation.
For a detailed review of the best storage options, visit La Leche League’s guide on breast milk storage.
Transporting Breast Milk
If you’re traveling or away from home, consider using insulated cooler bags with ice packs to keep breast milk cold.
This is particularly useful for storing pumped milk during commutes or outings.
Hygiene guidelines When Handling Breast Milk
When handling breast milk, hygiene is so important to keep it safe and healthy for the baby.
So, follow these simple steps:
- Wash hands thoroughly before handling milk.
- Use clean, sterilized containers and pump parts.
- Avoid touching the inside of storage bottles.
- Store milk in labeled, sealed containers in the fridge or freezer.
- Regularly clean and sanitize all surfaces and equipment.
Breast Milk Storage Guidelines
- Freeze immediately if unsure when it will be used, it helps preserve its nutrients effectively.
- Use feeding-sized portions – store milk in small amounts (2-4 oz) to minimize waste.
- Leave space for Expansion – breast milk expands when frozen, so leave about an inch of space at the top of the storage container.
- Follow FIFO (First In, First Out) – always use the oldest milk first.
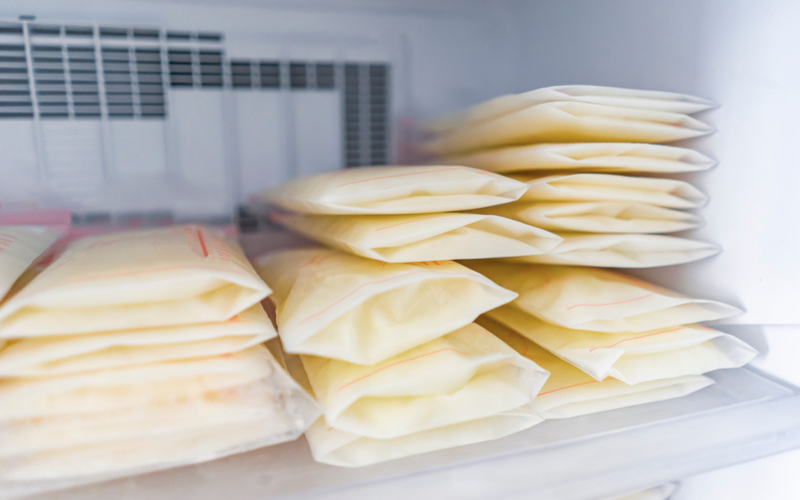
- Store bags flat – laying them down saves freezer space and speeds up thawing.

Building a Breast Milk Stash
Planning to return to work? If you still plan to provide your baby with breast milk, you need to build yourself a stash.
It’s also relevant if, for some other reason, you need to be away from your baby for an extended period.
Tips for Building a Breast Milk Stash:
- Start Early: Begin expressing and storing breast milk a few weeks before your comeback to the outside world or any extended baby breaks.
- Express Regularly: Establish a pumping schedule. Pump regularly, either after a feeding or during your baby’s naptime, to build up your stash gradually.
- Use a Quality Breast Pump: Invest in a top-notch breast pump that suits your needs and preferences. Double electric pumps are often recommended for efficient milk expression.
- Label and Date Each Container: Write the date of expression, the quantity of milk, and if it’s for daycare, include your baby’s name for easy identification.
- Stay Hydrated and Fed: Drink plenty of water and eat a balanced diet to support your milk supply while building your stash.
- Pump It Up: Experiment with different pumping techniques, such as hands-on pumping or breast massage, to maximize milk production.
Identifying Spoilage
No one likes to drink spoiled milk, let alone your baby.
So, how can you spot the spoilage?
Check for unusual smell, color changes, or separation in the milk.
Spoiled milk may appear lumpy (just like cow milk). Give it a swirl, if it remains chunky or curdled, it’s likely gone bad.
If you’re still not sure, you can give it a tiny taste – spoiled milk will have a noticeably sour or off flavor.
Always give it a quick sniff before feeding it to your little one. Trust your senses to ensure your baby gets the freshest milk possible.
How to Thaw Breast Milk
Thawing is the process of defrosting something that has been frozen.
It involves allowing the frozen item to return to its natural state by gradually warming it to room temperature or using other methods like warm water.
Thawing breast milk is essential to make it ready for feeding your baby.
How to properly thaw breast milk?
- Refrigerator Method: Transfer the frozen breast milk to the refrigerator the night before you need it. This allows for gradual thawing.
- Warm Water Method: Place the sealed container in a bowl of warm water. Avoid using hot water as it can destroy some of the milk’s beneficial properties.
- Avoid Microwaves and Oven: As it can create hot spots that can burn your baby’s mouth and damage the milk’s nutrients.
Breast Milk Thawing Guidelines
- Gently Swirl: Once thawed, gently swirl the container to mix any separated layers of milk.
- Check Temperature: Test the temperature of the milk by placing a few drops on the inside of your wrist. It should feel lukewarm, not hot.
- Use Thawed Milk Promptly: Thawed breast milk should be used within 24 hours. Once thawed, do not refreeze it.
- Avoid Wasting Milk: Thaw only the amount of breast milk you think your baby will consume to minimize waste. You can always thaw more if needed.
Breast Milk Colors Chart
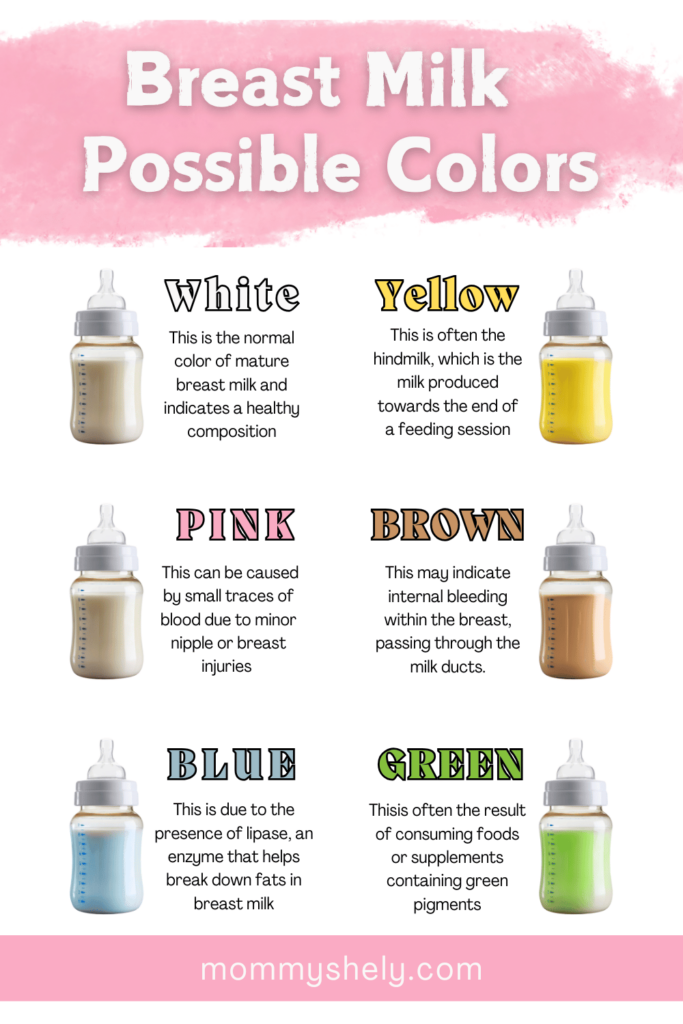
Breast milk can appear in different colors depending on diet, health, and milk composition.
Due it’s usually harmless, it may raise concerns for some mothers.
So, here’s what different breast milk colors may indicate:
| Color | Possible Cause | Safe for Baby? |
|---|---|---|
| White/Creamy | Normal milk | Yes |
| Blue-Tinted | High lipase breast milk* | Yes |
| Yellow | Colostrum or high-fat content | Yes |
| Green | Diet (leafy greens, supplements) | Yes |
| Pink/Red | Minor blood traces from minor nipple injuries | Consult a doctor if persistent |
| Brown | Old blood | Consult a doctor if persistent |
*What is high lipase breast milk?
Lipase is an enzyme that breaks down fat. Some moms notice their milk develops a soapy smell over time. It’s still safe, but some babies refuse it. Scald the milk before freezing to deactivate lipase.

Handling breast milk requires careful attention to ensure its quality and safety for your baby.
Just follow some simple steps like proper storage guidelines, identifying spoilage signs, and using gentle heating methods.
By following these guidelines, you can feel confident about building and maintaining your breast milk stash!
With love,
Shely


